In February of 2018, Facebook announced plans to prioritize personal content and de-prioritize content from pages. That means that if you’ve got a Facebook page for your local business, your content is only being seen by a very small percentage of your followers unless you pay to promote it.
Nothing to be done, right? It’s one of those things that you can’t control… or is it?
It turns out there’s a super-easy (and FREE) way to connect with both existing and potential customers on Facebook without paying to promote your content. It involves creating a Facebook group to promote your brand. Here’s what you need to know.
Group Content is Prioritized Ahead of Brand Content

The first thing you need to know is that Facebook has downgraded content posted by company and brand pages. However, it still prioritizes content from groups.
Why? Well, the short answer is that people must voluntarily opt in to a group.
You might be thinking that users have voluntarily followed your page, too – and that’s true. But Facebook views groups differently than pages. It has to do with the purpose of a group:
A group’s purpose is to promote conversation and build a community.
You might want your page to do that, too, but Facebook assumes that the primary goal of a page is to sell a product or service. That’s an important distinction.
In other words, by creating a Facebook group, you can build your brand and engage with customers without worrying that members won’t see your content.
Not convinced? There’s actually research to support the idea that groups are a better way to reach your audience than pages. A study by Digiterati revealed that groups get approximately 50% more reach than pages.
Creating a Group is Easy

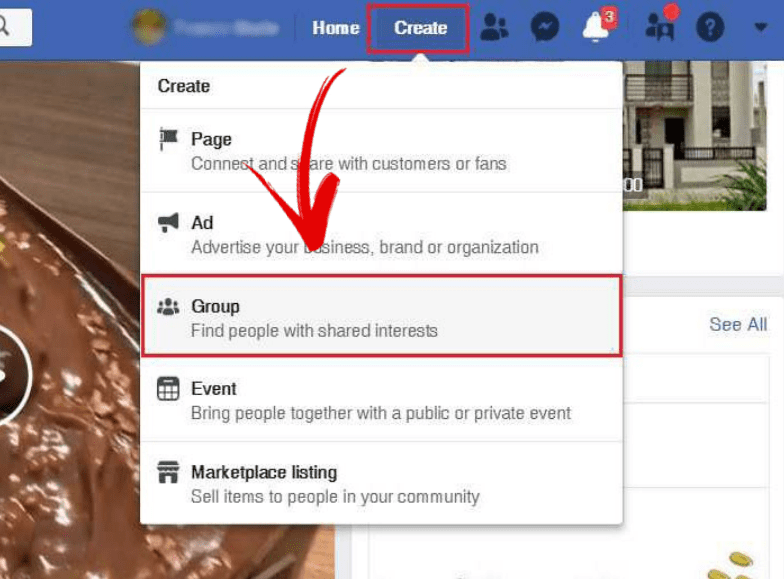
You can create a Facebook group from your personal Facebook page. In fact, the process is very similar to the one for creating a Facebook page like the one you have for your business.
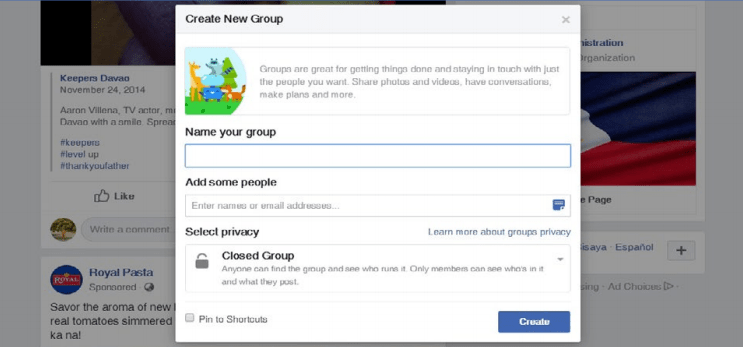
Simply go to the upper, right-hand corner of your Facebook page and click the little down arrow there. You’ll see an option to Create Group. Click it and follow the steps.
It’s important to choose a memorable, brand-specific name for your group. You don’t want to give it the same name as your page, but you do want it to appear in the search results when people search for your business.
The title should be inspired by the content you’ll be posting. So, if you run a dog grooming business, you might offer dog care tips and incorporate that into your group name, like this:
Fancy Dog Groomer’s Dog Care Advice
In other words, combine your business with name with some compelling, buzzy words to make people want to join your group.
Invite People to Join

You’ve created a group… but what’s next?
- Send group invitations to everyone who follows your business page.
- Send invitations to your personal connections on Facebook.
- Send an email to your list with a link to your group and an invitation to join.
- If you have a Twitter account for your business, Tweet an invitation to your followers.
It’s likely that a significant percentage of your followers will join the group. Once they’ve done that, you can also post content in the group encouraging members to send out invitations.
Create Compelling Content

Once you’ve created your group and invited some members, it’s time to create content. Remember, the primary goal of group content is to drive engagement. You want members to be talking to you and to one another.
Facebook has a tool to create Welcome posts. Underneath Members on the toolbar, click Write Post. Facebook will automatically tag up to 100 new members (in this context, new means that they have joined in the past seven days) in the post. If you prefer, you can write a general welcome post and ask new members to introduce themselves in the comments.
- Inspirational posts can be a good way to engage your members. For example, if you’re a life coach, you might post something inspirational on a Monday morning and then ask group members what they do to keep themselves motivated.
- Tips and advice can also make great content. You can share things that you’ve picked up while running your business and then ask members if they have anything to add – or if they’ve tried any of the things you’ve suggested.
- Community discussions can drive engagement and make your group page a lively place to be. You might post a question or conversational topic and then ask members to chime in with their answers or opinions.
- Q & A posts are great for getting people involved. Creating a post can be a simple as saying “I know people have questions about ______. Post them in the comments and I’ll answer them!” Only do a post like this on a day when you have the time to respond promptly.
- Depending on the kind of business you run, you may want to share success stories from members. For example, if you do local marketing, you could share a story from a member who killed it with a marketing campaign. And if you sell a product, you could share photos of members using what they bought.
The content you create will have a direct impact on the success of your group.
Social Learning Groups


Do you have the kind of business that lends itself to the creation of video courses? If you do, you might want to check out Facebook’s new Social Learning Groups feature, which enables groups to add video courses to their group pages.
To add courses, go to the Edit Group Settings tab and choose Group Type. Then, select Social Learning Group from the menu.
From there, you can create new Units for your courses. They can be optional or mandatory, and if they’re mandatory, users will see a progress bar to track their accomplishments.
The great thing about this feature is that you can upload courses or webinars you have already created or create new content. You can find a full guide on how to use this feature here.
Groups Are the New Pages
The bottom line is that Facebook Groups are to businesses today what Facebook Pages were five years ago. They offer an inexpensive but effective way to connect with current and prospective clients, build your brand, and grow your business.


